Hey besties!
I’m back with my second project for the Altenew Educator Certification Program, and this time I dove into the All about Layers #4 class. And wow—this one seriously flipped how I look at my stash (and scraps).
💡 The Technique That Stuck With Me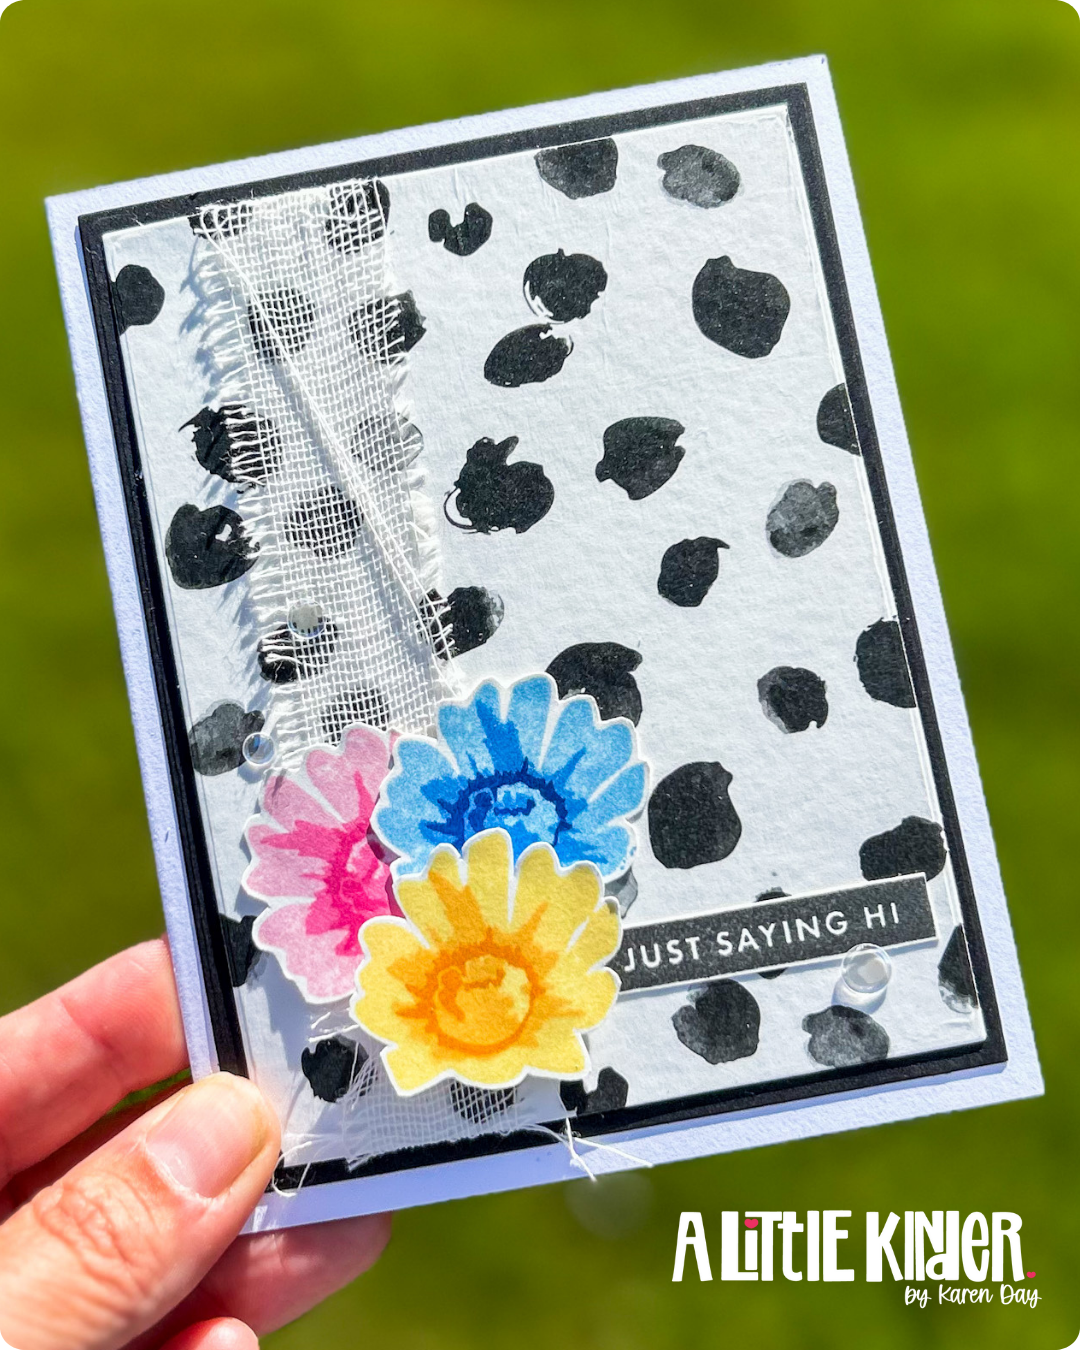
One of my biggest takeaways from this class? Don’t sleep on cutting your stamped images apart! Seriously. I had always used them as-is, like little rules in rubber form. But this class showed how fussy cutting and reconfiguring pieces gives you so much more flexibility with your design. Game-changer.
Another idea that caught my attention was stamping your sentiment repeatedly behind your focal image to create texture. It’s subtle, interesting, and doesn’t compete with your main element. That got my creative wheels turning.
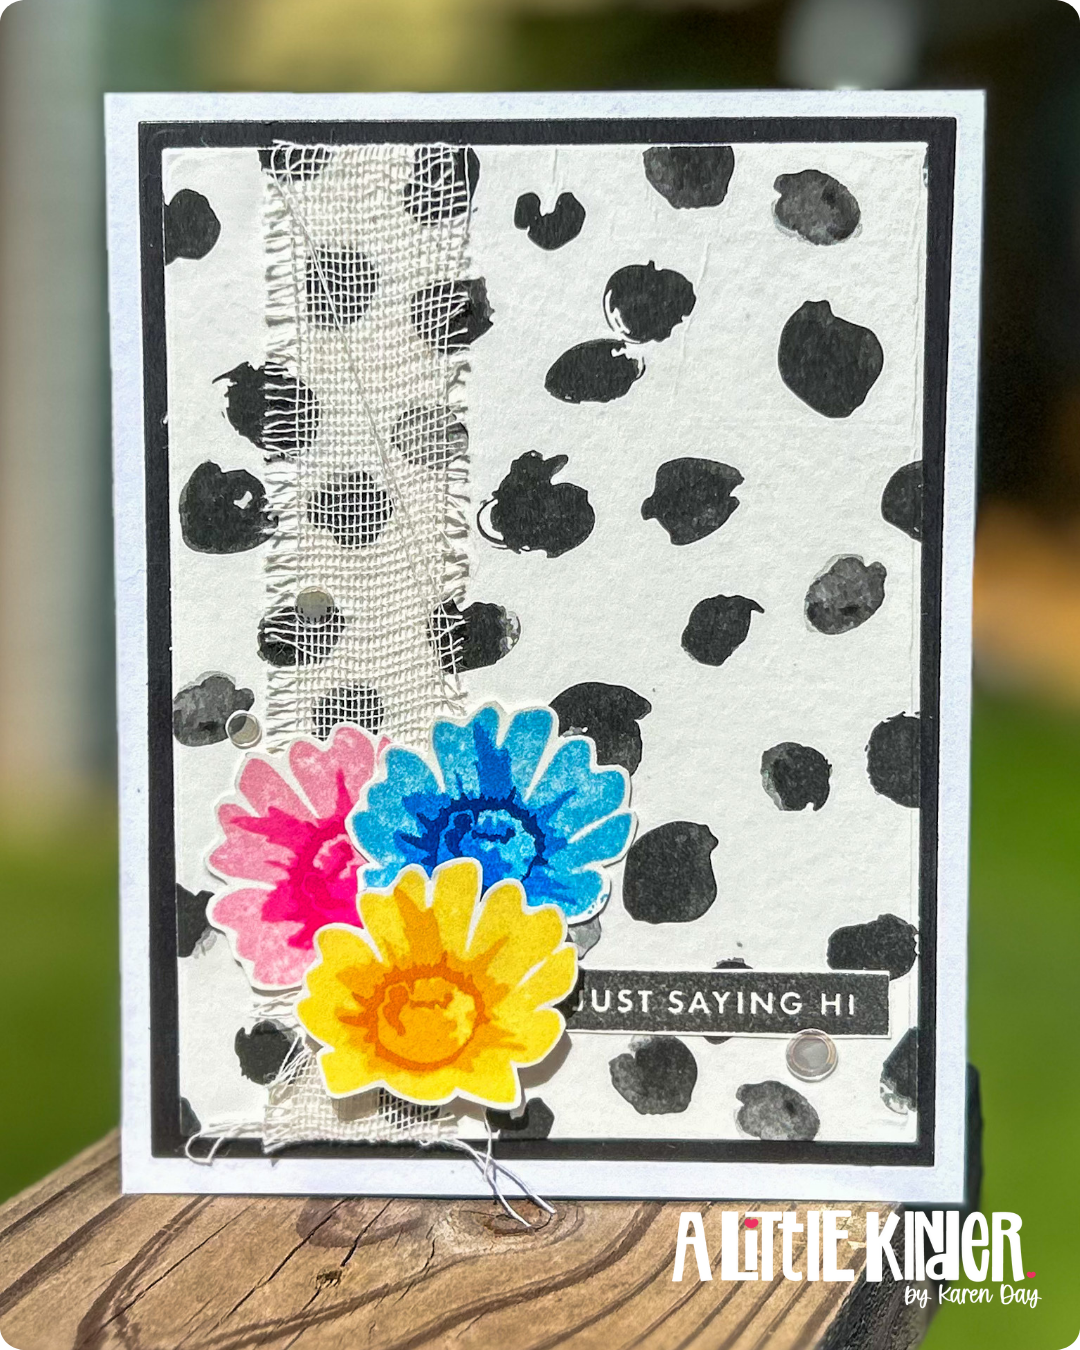
🖤 Enter: Washi Tape as Background Texture
I wanted to play with that subtle-background-but-bold-foreground contrast, and immediately thought of my black-and-white dot washi tape. It’s soft in texture but graphic in style—and makes the perfect “not too loud” backdrop.
From there, I pulled in my bold, bright florals. These flowers were stamped in vibrant colors, fussy cut, and then flipped/angled to fill the space the way I wanted. That freedom to just turn and tweak each piece made it way easier to create a layout that felt right.
Oh—and I added a little strip of mummy tape ribbon down the side for softness and texture. It’s giving floral meets fashion editorial and I’m not mad about it.
 🎨 Supplies Used
-
Black and white dot washi tape (background)- retired Altenew
-
Daisy Stamp set and Altenew inks
-
Sentiment: “Just Saying Hi” (Altenew set)
-
Tim Holtz Mummy tape
-
Tim Holtz Fussy-cut scissors (your new best friend)
- Black Cardstock
- A2 top fold cardbase
🧠 What I Learned
-
Don’t be afraid to chop things up! Die cuts and stamped images are more versatile than they look.
-
Backgrounds don’t always need to be complicated—repetition or even just a strip of washi can add SO much interest.
-
If something feels too “flat,” add a little texture—fabric, thread, extra layering. It can pull a design together fast.
💬 Let’s wrap up this card with some final thoughts…
This project reminded me that sometimes the magic is in the mix—the contrast between soft and bold, clean and chaotic, pre-cut and hand-trimmed. And most importantly? That there are no rules when it comes to making something beautiful.
So here’s my challenge to you, ’cause if you’re like me you love a good challenge:
Grab something from your stash today and try using it in a totally different way.
Cut it apart. Flip it. Layer it. Stamp it sideways. Whatever feels fun—just create something that feels like you.
Until I see you again…
Try the things. Make the mess. Stay inspired!
1 Comment. Leave new
Your post is very well-writen and your card is fantastic!