 I love a card that feels layered, thoughtful, and just a little bit magical—and that’s exactly what I was going for with this one. This card was created for the Letter to Santa Hashtag Happenin’ over at This Calls for Confetti, and I knew I wanted to combine one of their cozy holiday ephemera pieces with something fresh and technique-driven in the background.
Let’s start with the star of the show: the background. This snowfall pattern you see was created using not one but two different stenciling methods. First, I did a traditional ink-blended background. I taped the stencil down and blended from top to bottom using three shades of Altenew inks in an ombré pattern. I wanted it to look soft but vivid—like the sky behind Santa had some mood and magic to it.
But then I added a little twist.
The second version of the background uses a technique I’m calling blackout stenciling. Here’s how it works: instead of blending ink through the stencil onto the paper, you actually ink up the stencil itself. I laid the stencil flat and applied the same three shades of Altenew ink directly onto the stencil surface in an ombré blend. Then, I taped the top edge of the stencil to my cardstock like a hinge. That way, I could lift and lower it again if I needed to add more ink or make adjustments.
Once inked, I closed the stencil over the paper and ran the whole thing through my die cutting machine. Instead of cutting anything, this process transfers the ink from the stencil onto the cardstock—leaving a beautiful reverse pattern that feels soft and dreamy. It’s a subtle shift from traditional stenciling, but the effect is gorgeous. I love that it gives more of a watercolor-like texture to the design.
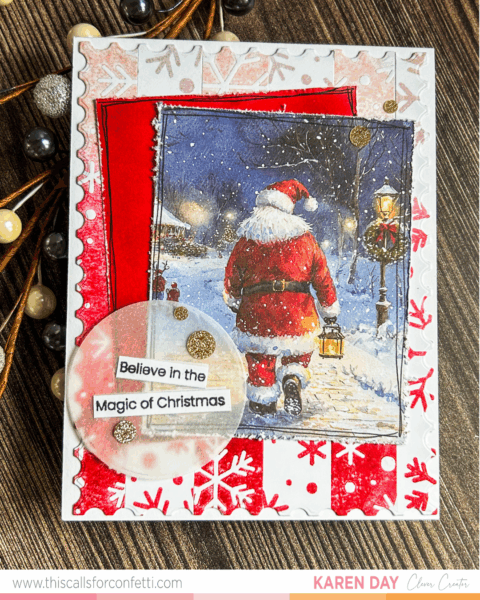
With both panels completed, I trimmed them into one-inch vertical strips and alternated the blackout version with the traditional version as I adhered them to a new card front. That gave the background movement, depth, and a little unexpected energy. Once the strips were in place, I used the This Calls for Confetti Postage Stamp die to create the edge, which adds just the right amount of whimsy.
The focal image is a Santa from the newest ephemera set. I trimmed off the dome shape from the top of the image and mounted it onto a piece of cardstock I ink blended to match the deepest color in my ombré background. That helped everything feel really cohesive and grounded the piece so Santa didn’t float.
To finish the card, I added a vellum circle layered with a two-line stamped sentiment and popped on some of my favorite gold glitter confetti sequins from This Calls for Confetti. They’ve quickly become my go-to embellishment—just enough sparkle without overwhelming the card. You can grab all the things I used in this card (the ephemera, Snowfall Stencil, and the postage die) here: https://bit.ly/tcfc_karen
This card was a joy to make. I love how the layered stencil techniques made the background feel unique, while Santa keeps the whole thing classic and nostalgic. Whether you’re writing a real letter to Santa or just carving out a little time to create during a busy season, I hope this inspires you to try something new with your stencils—and maybe even send a little magic through the mail.