 Every month on the 20th, I look forward to the Pattern Paper Instagram Hop—it’s the perfect excuse to dig into my stash and put all those beautiful but often neglected patterned papers to good use. This month, I reached for something that’s been sitting in my drawer just waiting for the right moment: the Tim Holtz paper strip pack. These paper strips are full of vintage charm, and their long, narrow shape gave me the perfect foundation for a background I’ve been wanting to try.
I love this kind of project because it’s creative and calming all at once. It’s one of those sit-down-and-play techniques that gives you permission to explore color, pattern, and texture without overthinking it.
The first step was sorting through the strips. I knew I wanted to use a variety of tones—lights, darks, neutrals, pops of florals—but I didn’t want to end up with a muddy mix that lacked contrast. So I took a few minutes to lay out all the strips and separate them into piles based on their base color. Browns in one, creams and whites in another, florals in their own spot. It might seem like a small thing, but this organizing step saved me so much time and decision-making later.
 Once I had my piles ready, I started building the background on a standard A2 card front panel made of just copy paper. I glued the strips down on a diagonal to give the background movement and energy. I also made sure to alternate between light and dark strips to keep the contrast interesting and visually balanced. There’s no real wrong way to do this—just trust your eye and have fun with it.
Using the benefit of using the copy paper, is that you aren’t married to placement. And you aren’t adding a lot of bulk to the card either. I use copy paper a lot in my cards where I am paper piecing pattern paper.
I also recommend using some kind of grid mat to get you started. It’s not as big of a deal when you are working diagonally but defiantly needed for any kind of straight lines. I do keep a Simon Says Stamp 6″ T square handy for the straight things too.
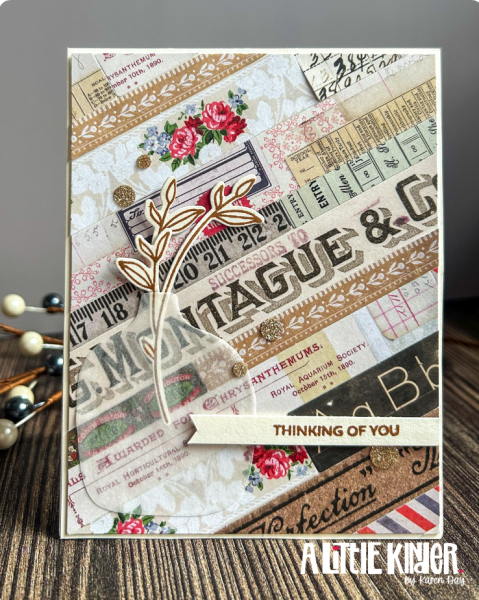
With the background in place, it was time to add a focal point. I knew I wanted to keep the feeling soft and thoughtful, so I cut a vellum shape to act as a vase. The transparent vellum lets the background shine through but still gives the sprig a place to rest. For the floral stem, I used the honeysuckle image from the Alice’s Story stamp set by This Calls for Confetti. This set has such elegant lines, and the matching die made cutting it out a breeze—but there’s a trick to getting those long stems to line up just right when stamping.
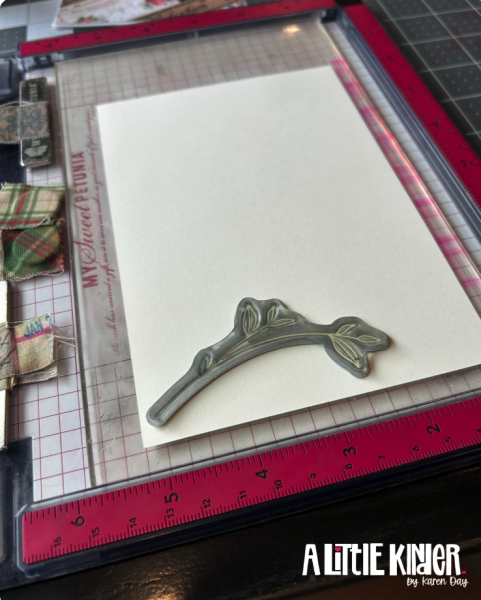 Here’s my tip: I place the negative space from the die cut into my Misti and tuck the stamp into that space. That way, when I stamp onto the die cut itself, it’s perfectly aligned—even on those tricky long stems. It’s a simple method that’s saved me from a lot of misaligned stamping (and wasted cardstock!).
For the sentiment, I kept it simple: “Thinking of You,” stamped on a narrow banner. I love how the rich, vintage textures of the background contrast with the delicate linework of the honeysuckle sprig. And of course, I had to finish it off with a few glittery gold dots for a little sparkle and movement.
This was such a satisfying card to make. It’s a great reminder that those little paper scraps really can come together into something beautiful. Whether you’ve got a drawer full of Tim Holtz strips or just a pile of leftover patterned paper, this technique works with anything. It’s all about playing with pattern and finding balance.
Want to see the full post? Head over to my Instagram and check it out here: https://www.instagram.com/alittlekinder/
Whether you’re hopping along with us this month for the Pattern Paper IG Hop or not, I hope you feel inspired to pull out your scraps and make something beautiful today. Thank you for stopping by my little corner of the internet! I’m so glad that you are here.