Hey friends!
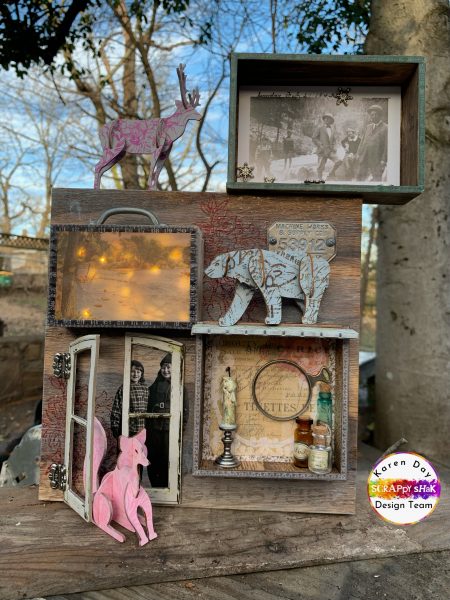
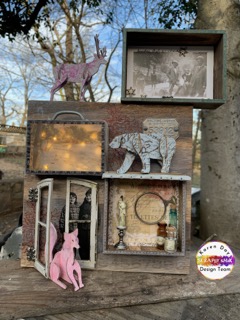
Today I am bring you an epic make! Ok epic for me. To date I have made exactly 3 multi diminutional makes. You know the free standing kind. This one was the hardest but also probably my favorite now that it is completed. I was asked to work with and give my opinion on a new product coming to Scrappy Shak. And if you’ve been around here for a minute you know I love to tell it like it is! What is the product you ask? Well it’s a line of exclusive wood and chip board based elements. Some are flat and some, like the ones in this make, are 3D.
Here is the finished project:
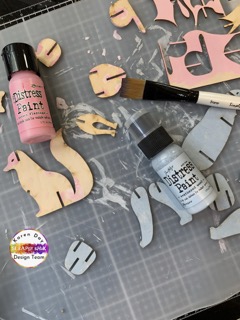
Let’s dive in and walk through this project. I started with the Scrappy Shak exclusive wooden animals. I painted them with Distress Paint.
Once the pieces were dry, I stamped on each piece with Distress Archival ink.
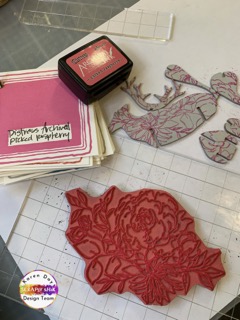
I heat set each piece and set it aside to work on the base. For this piece, I started with a large square vignette box. I decided to use the flat side as the base. I dry brushed some of the Lost Shadow Distress Paint across the back.
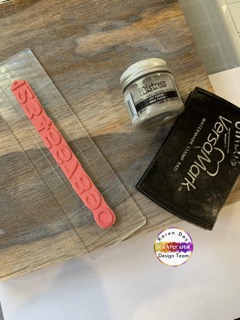
Once dry brushed, I used VersaMark ink and several stamps to add embossed areas to the vignette box. On the numbers I used Distress Glaze in Lost Shadow. And then Lumberjack Plaid Distress Gloss for the floral images.
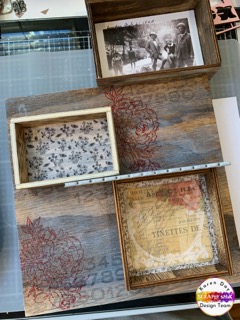
I picked three smaller vignette boxes and added them to the large one. I thought of each box as if it was a window for the wooden animals to interact with. Starting at the top- the snapshot picture features a group of explorers who had stopped by a creek or river. I though this was perfect for the deer. The middle box I added tiny lights and a transparency too. The transparency is of a river. I pictured the bear catching fish there. And the bottom box became a “shop” window with a door next to it.
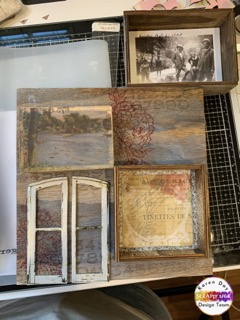
This bottom section is where I planned to showcase the “fox”, which I decided was a dog for this project ;). The doors are actually a window from the Tim Holtz chipboard windows. I cut it in half with an exacto knife and added the hinges so that it would open on one side.
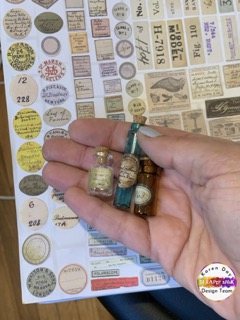
One of my favorite elements in this project are the little glass bottles that I made. The blue one is colored with alcohol ink. I added them into the “shop” window at the bottom with the candle and the magnifying glass.
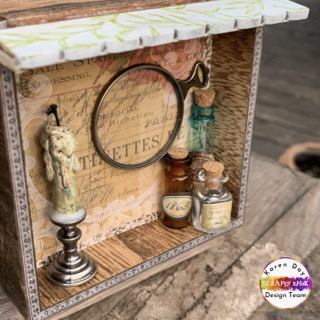
This is the complete shop window. I really love how it came together in the end. Looks like somewhere we would need to shop before heading out!
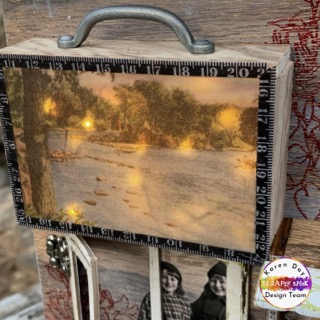
This in on the bear level. I wanted to use one of the vignette boxes as a suite case, I mean we are going on an expedition! But I also wanted to showcase this image of a river. The thought was that you would see the bear in the forest near a river while on expedition.
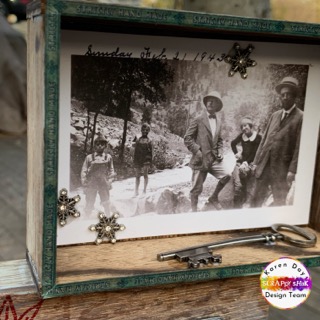
This is the very top of the vignette. This is the deer layer and where we see our travelers out on their expedition. I added some snowflake charms and a key to the box for interest.
This project really was a labor of love. I do not consider myself an engineer but I managed to make 90% of my ideas work! For that, I am very happy with how things turned out.
Products Used:
Papers: Tim Holtz Backdrops,
Paints: Tim Holtz Distress Paint
Embellishments: Tim Holtz Paper Dolls, Tim Holtz Snap Shots, Tim Holtz metals
Favorite Adhesives: Scrappy Shak (https://tinyurl.com/5b92675k )
Scrapbook.com: (https://shrsl.com/3x1xw0 )